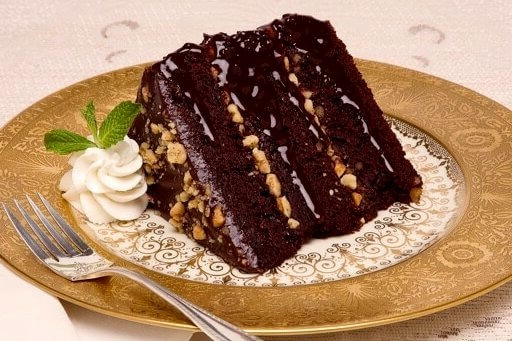
The Claim Jumper Motherlode Cake Recipe is a true dessert legend. It is big, rich and full of deep chocolate flavor. This cake has six layers, thick frosting and a bold look.
Many people love it because it feels like a celebration in every bite. If you ever enjoyed this cake at the restaurant, you know how amazing it tastes.
Today, I will show you how to make this Claim Jumper Motherlode Cake Recipe at home. The steps are simple, and the ingredients are easy to find.
Once you learn how to make Claim Jumper Motherlode Cake, you will want to bake it again and again. I will also share the best ingredients for Claim Jumper Motherlode Cake so your cake turns out perfect every time.
My Experience With This Recipe
I love chocolate, so this cake made me very happy from the first bite. The layers are soft and moist. The frosting is rich and smooth. The first time I tried making this cake, I was shocked at how tall it looked.
It felt like a bakery-style cake right in my kitchen. My family loved it so much they asked for it again the next week. This recipe is great for birthdays, parties, or any day you want something special.
Recipe Card Info
- Recipe Name: Claim Jumper Motherlode Cake
- Servings: 12
- Prep Time: 35 mins
- Cook Time: 30 mins
- Total Time: 1 hour 5 mins
- Course: Dessert
- Cuisine: American
- Calories: 650 kcal per serving
Equipment List
- Two 9-inch cake pans
- Mixing bowls
- Electric mixer
- Spatula
- Whisk
- Cooling rack
- Knife
- Cake stand
Ingredients You Need for Claim Jumper Motherlode Cake
- 2 cups all-purpose flour
- 2 cups sugar
- ¾ cup cocoa powder
- 2 teaspoons baking powder
- 1 teaspoon baking soda
- 1 teaspoon salt
- 1 cup milk
- ½ cup vegetable oil
- 2 large eggs
- 2 teaspoons vanilla
- 1 cup hot water
Chocolate Frosting
- 1 cup butter
- ½ cup cocoa powder
- 4 cups powdered sugar
- 6 tablespoons milk
- 1 teaspoon vanilla
Instructions
1. Prepare the pans
Grease two cake pans and line with paper. This helps remove the cake easily without breaking the soft layers.
2. Mix dry ingredients
Add flour, sugar, cocoa, baking powder, baking soda and salt in a bowl. Mix well until smooth and fully combined.
3. Add wet ingredients
Add milk, eggs, oil and vanilla to the dry mix. Stir with a mixer until the batter looks smooth and creamy.
4. Add hot water
Pour hot water slowly into the bowl. Mix well until the batter becomes thin. This makes the cake moist and soft.
5. Bake the cake
Pour the batter into the pans. Bake for 30 minutes at 350°F. Check with a toothpick for doneness.
6. Cool the cakes
Place the pans on a rack. Let the cakes cool fully before slicing them into layers for stacking.
7. Make the frosting
Mix butter and cocoa. Add sugar, milk, and vanilla. Beat until the frosting becomes thick, smooth, and creamy.
8. Slice the layers
Cut each cake into three layers. This gives you six layers, just like the classic Motherlode Cake.
9. Frost the layers
Add frosting between each cake layer. Spread evenly to keep the cake tall and stable while stacking.
10. Frost the outside
Cover the whole cake with more frosting. Smooth the sides and top for a clean and beautiful finish.
Recipe Tips
- Use hot water for the batter. It gives a moist and fluffy cake texture.
- Chill the cake before slicing. It helps get even layers.
- Spread a thin frosting layer first to trap crumbs. Then frost again for a smooth look.
- Use good-quality cocoa powder for rich chocolate flavor.
- Store leftover cake in the fridge for the best texture.
Nutrition Information
| Nutrient | Amount |
|---|---|
| Calories | 650 kcal |
| Carbs | 85g |
| Fat | 30g |
| Protein | 6g |
Serving Suggestions
This cake tastes great with cold milk or hot coffee. You can also add a scoop of vanilla ice cream on the side for extra sweetness.
Fresh berries add a nice pop of color and flavor too. Serve the cake cold or slightly warm. Both ways taste amazing.
Best Sides To Serve With
- Vanilla ice cream
- Fresh strawberries
- Whipped cream
- Chocolate syrup drizzle
- Hot coffee or espresso
Storage and Reheating Tips
Store the cake in an airtight container in the fridge. It stays fresh for four days. If you want to freeze it, wrap the slices in plastic wrap.
Then place them in a freezer bag. The cake will stay good for up to two months. To reheat, warm a slice in the microwave for ten seconds.
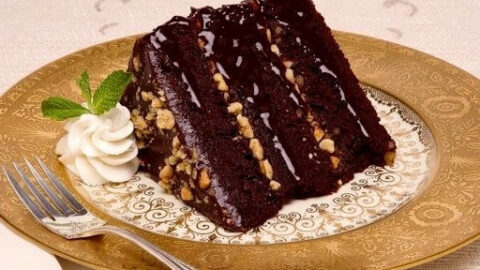
Claim Jumper Motherlode Cake Recipe
Ingredients
- 2 cups all-purpose flour
- 2 cups sugar
- ¾ cup cocoa powder
- 2 teaspoons baking powder
- 1 teaspoon baking soda
- 1 teaspoon salt
- 1 cup milk
- ½ cup vegetable oil
- 2 large eggs
- 2 teaspoons vanilla
- 1 cup hot water
Chocolate Frosting
- 1 cup butter
- ½ cup cocoa powder
- 4 cups powdered sugar
- 6 tablespoons milk
- 1 teaspoon vanilla
Instructions
Prepare the pans
- Grease two cake pans and line with paper. This helps remove the cake easily without breaking the soft layers.
Mix dry ingredients
- Add flour, sugar, cocoa, baking powder, baking soda and salt in a bowl. Mix well until smooth and fully combined.
Add wet ingredients
- Add milk, eggs, oil and vanilla to the dry mix. Stir with a mixer until the batter looks smooth and creamy.
Add hot water
- Pour hot water slowly into the bowl. Mix well until the batter becomes thin. This makes the cake moist and soft.
Bake the cake
- Pour the batter into the pans. Bake for 30 minutes at 350°F. Check with a toothpick for doneness.
Cool the cakes
- Place the pans on a rack. Let the cakes cool fully before slicing them into layers for stacking.
Make the frosting
- Mix butter and cocoa. Add sugar, milk, and vanilla. Beat until the frosting becomes thick, smooth, and creamy.
Slice the layers
- Cut each cake into three layers. This gives you six layers, just like the classic Motherlode Cake.
Frost the layers
- Add frosting between each cake layer. Spread evenly to keep the cake tall and stable while stacking.
Frost the outside
- Cover the whole cake with more frosting. Smooth the sides and top for a clean and beautiful finish.
Notes
- Use hot water for the batter. It gives a moist and fluffy cake texture.
- Chill the cake before slicing. It helps get even layers.
- Spread a thin frosting layer first to trap crumbs. Then frost again for a smooth look.
- Use good-quality cocoa powder for rich chocolate flavor.
- Store leftover cake in the fridge for the best texture.
FAQs about Claim Jumper Motherlode Cake Recipe
1. Can I use butter instead of oil?
Yes, you can use melted butter, but the texture may become slightly dense. Oil keeps the cake moist and soft.
2. How do I keep the cake layers even?
You can use a long knife or a cake leveler. Chilling the cake before cutting gives cleaner, smoother layers.
3. Can I make the cake one day before?
Yes, the cake tastes even better the next day. The flavors settle, and the frosting becomes richer.
4. Can I use store-bought frosting?
Yes, but homemade frosting gives a fresher and deeper chocolate taste. It also spreads more smoothly on layers.
5. How do I stop the cake from crumbling?
Let the cake cool fully before cutting. Warm cake breaks easily, so cooling is important.
Conclusion
The Claim Jumper Motherlode Cake Recipe is perfect for anyone who loves chocolate. With rich layers and creamy frosting, it feels like a bakery-style dessert made at home.
The steps are simple, and the ingredients are easy to find. Once you try it, you will see how fun and rewarding it is to make this tall and beautiful cake. Enjoy each bite with your family and friends. Happy baking!
Sara Collins is a food blogger at TastyDive. She shares simple and family-friendly recipes made with everyday ingredients. Her mission is to help home cooks enjoy tasty meals without stress.