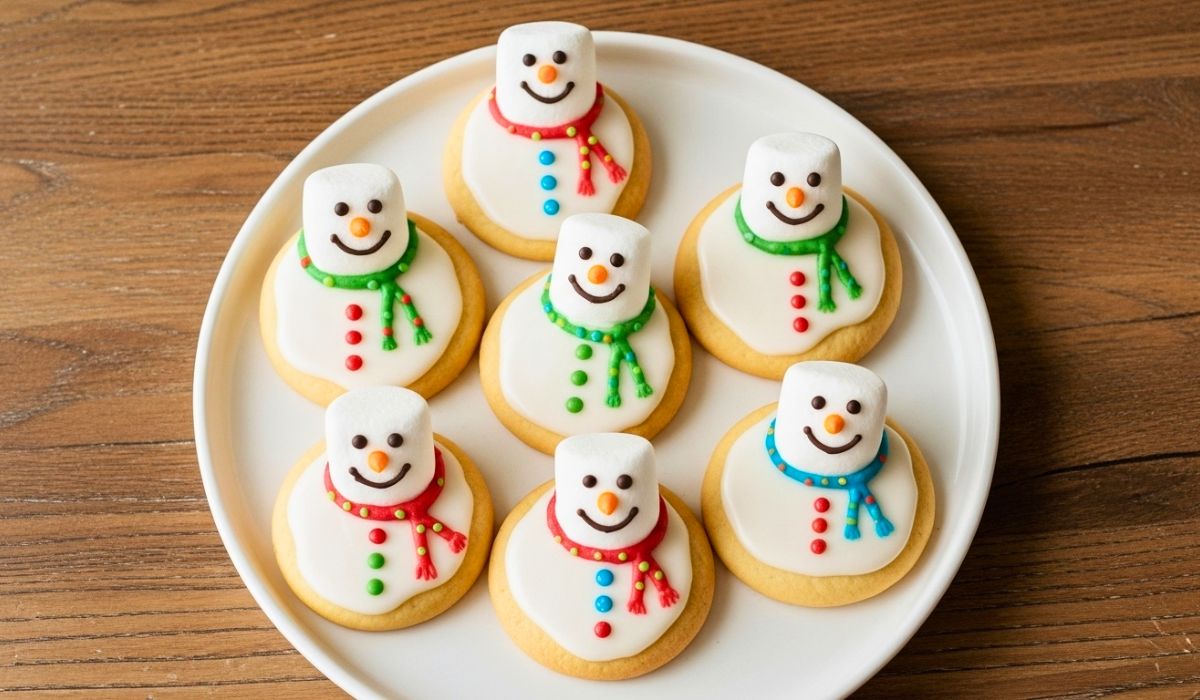
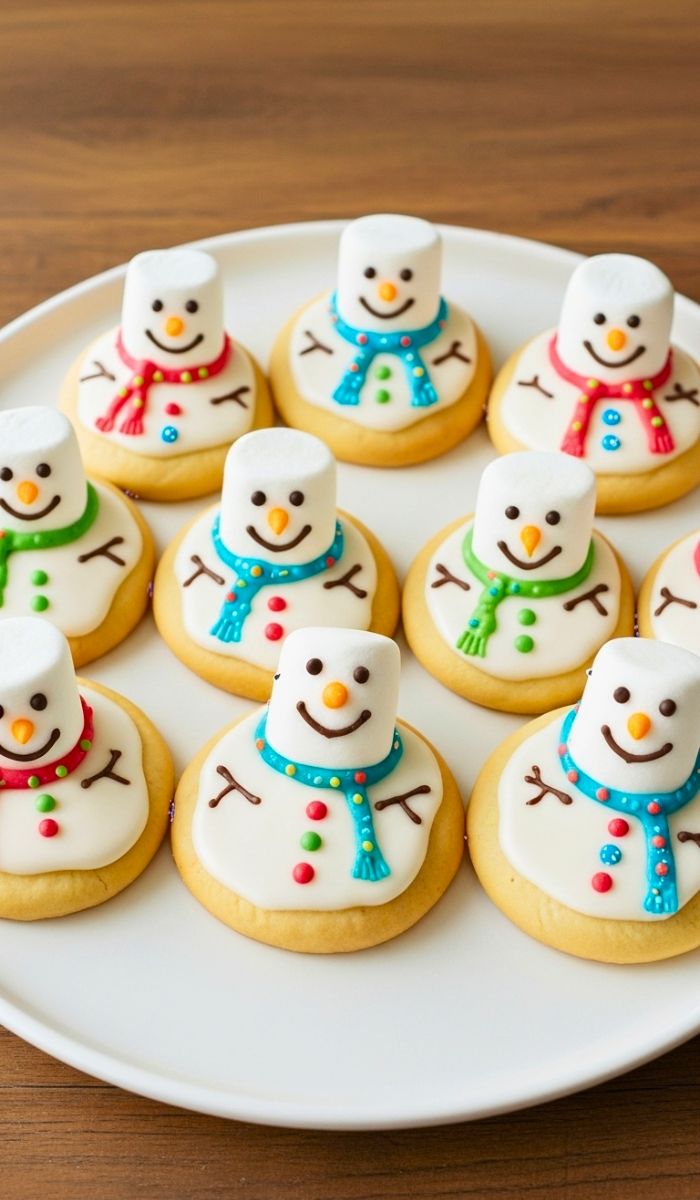
This Melted Snowman Cookies Recipe is cute, fun and very easy to make. These cookies look like tiny snowmen melting on a warm day.
They are perfect for holidays, parties, or baking with kids. You only need simple items like cookies, marshmallows, icing and candy.
The Melted Snowman Cookies Recipe is also great because you can decorate each cookie in your own style.
If you want a dessert that looks funny and tastes sweet, this is a perfect choice. You will learn how to make Melted Snowman Cookies step by step. This recipe is simple, creative and brings smiles to everyone.
My Experience With This Melted Snowman Cookies Recipe
I made these cookies for a winter party, and everyone loved them. They looked funny and sweet. Kids loved the melting marshmallow snowmen and adults liked the soft cookies.
The best part was decorating each snowman differently. It was simple, creative and very enjoyable.
Recipe Card Info
- Recipe Name: Melted Snowman Cookies
- Servings: 12 cookies
- Prep Time: 15 mins
- Cook Time: 10 mins
- Total Time: 25 mins
- Course: Dessert
- Cuisine: American
- Calories: 180 kcal per serving
Equipment List
- A baking sheet
- Parchment paper
- A mixing bowl
- A whisk
- A spoon
- A microwave-safe bowl
- A piping bag or plastic bag for icing
Ingredients You Need for Melted Snowman Cookies
- 12 round sugar cookies (store-bought or homemade)
- 12 large marshmallows
- 1 cup white icing
- 2 tablespoons chocolate chips (melted)
- 24 mini chocolate chips for eyes
- 12 orange sprinkles for noses
- Colored sprinkles for scarves
- Colored icing for buttons
Instruction
1. Bake the cookies
Bake sugar cookies until light golden and soft. Let them cool fully before decorating.
2. Melt the icing
Warm white icing in a microwave for a few seconds until smooth and slightly runny.
3. Spread icing on cookies
Pour a spoon of melted icing on each cookie and let it spread like melted snow.
4. Melt the marshmallows
Warm marshmallows in the microwave for ten seconds until soft but not melted.
5. Place marshmallows
Place one warm marshmallow on each cookie as the snowman’s melting head.
6. Add eyes
Press two mini chocolate chips on the marshmallow to make tiny eyes.
7. Add the nose
Place one orange sprinkle on the marshmallow to make the snowman’s carrot nose.
8. Draw mouth
Use melted chocolate to draw a small smile on each snowman for a cute face.
9. Add buttons
Use colored icing to draw buttons on the melted icing part of each cookie.
10. Add scarf
Use colorful sprinkles or icing to make a scarf around the marshmallow.
11. Let them set
Let the cookies sit for a few minutes so icing can become firm and hold shape.
12. Check details
Check each cookie and fix any missing eyes, noses, or buttons before serving.
13. Add extra decorations
Add more sprinkles around the cookie if you want a snowy effect.
14. Place on tray
Place decorated cookies on a tray lined with parchment paper.
15. Serve
Serve the cookies fresh and enjoy the cute melted snowmen.
Recipe Tips
- Use soft cookies so decorations stick better.
- Warm icing slightly for smooth spreading.
- Do not fully melt the marshmallows.
- Use bright sprinkles for fun colors.
- Decorate quickly before the icing becomes firm.
Nutrition Information
| Item | Amount |
|---|---|
| Calories | 180 kcal |
| Carbs | 28 g |
| Protein | 1 g |
| Fat | 7 g |
| Fiber | 0 g |
Serving Suggestions
Serve with hot chocolate or warm milk. Place them on a holiday platter for parties.
nbv Give them as cute gifts in small boxes. Use them as fun treats for school events. Serve with other holiday cookies for variety.
Variations You Can Try
Use chocolate cookies instead of sugar cookies. Add coconut flakes for a snowy look. Use candy eyes instead of chocolate chips. Make silly faces for each snowman. Add edible glitter for shiny snow.
Storage and Reheating Tips
- Store cookies in an airtight box for three days.
- Keep them at room temperature to hold shape.
- Do not refrigerate because icing becomes too hard.
- Do not reheat because decorations will melt.
- Place wax paper between layers if stacking.
FAQs about Melted Snowman Cookies
1. What makes this Melted Snowman Cookies Recipe special?
This recipe is special because it is cute, easy and fun for all ages. The cookies look like melting snowmen, which makes them perfect for winter celebrations, holiday parties, and simple baking fun with kids.
2. Can I use store-bought cookies for this recipe?
Yes, store-bought sugar cookies work great. They save time and make the decorating part simple. You just add icing and toppings to create cute snowmen without baking from scratch.
3. Can kids help make these cookies?
Yes, kids love decorating these cookies. They can add eyes, noses, buttons and scarves. This makes the recipe a great family activity, especially during winter breaks and holidays.
4. How do I keep the marshmallows from melting too much?
Heat marshmallows for only a few seconds so they soften but keep their shape. If marshmallows get too hot, they melt flat and lose the snowman look.
5. Can I prepare these cookies ahead of time?
Yes, you can make them a day early. Just store them in a sealed box at room temperature. Do not refrigerate because icing and marshmallows become too hard.
Conclusion!
This Melted Snowman Cookies Recipe is cute, fun, and very easy to make. You now know how to make Melted Snowman Cookies with simple steps and creative decorations.
The ingredients for Melted Snowman Cookies are basic, cheap and easy to find. These cookies bring joy to holiday tables and make everyone smile.
Try them today and enjoy sweet, adorable snowmen that melt in both shape and flavor.

Melted Snowman Cookies Recipe
Ingredients
- 12 round sugar cookies store-bought or homemade
- 12 large marshmallows
- 1 cup white icing
- 2 tablespoons chocolate chips melted
- 24 mini chocolate chips for eyes
- 12 orange sprinkles for noses
- Colored sprinkles for scarves
- Colored icing for buttons
Instructions
Bake the cookies
- Bake sugar cookies until light golden and soft. Let them cool fully before decorating.
Melt the icing
- Warm white icing in a microwave for a few seconds until smooth and slightly runny.
Spread icing on cookies
- Pour a spoon of melted icing on each cookie and let it spread like melted snow.
Melt the marshmallows
- Warm marshmallows in the microwave for ten seconds until soft but not melted.
Place marshmallows
- Place one warm marshmallow on each cookie as the snowman’s melting head.
Add eyes
- Press two mini chocolate chips on the marshmallow to make tiny eyes.
Add the nose
- Place one orange sprinkle on the marshmallow to make the snowman’s carrot nose.
Draw mouth
- Use melted chocolate to draw a small smile on each snowman for a cute face.
Add buttons
- Use colored icing to draw buttons on the melted icing part of each cookie.
Add scarf
- Use colorful sprinkles or icing to make a scarf around the marshmallow.
Let them set
- Let the cookies sit for a few minutes so icing can become firm and hold shape.
Check details
- Check each cookie and fix any missing eyes, noses, or buttons before serving.
Add extra decorations
- Add more sprinkles around the cookie if you want a snowy effect.
Place on tray
- Place decorated cookies on a tray lined with parchment paper.
Serve
- Serve the cookies fresh and enjoy the cute melted snowmen.
Notes
- Use soft cookies so decorations stick better.
- Warm icing slightly for smooth spreading.
- Do not fully melt the marshmallows.
- Use bright sprinkles for fun colors.
- Decorate quickly before the icing becomes firm.
Sara Collins is a food blogger at TastyDive. She shares simple and family-friendly recipes made with everyday ingredients. Her mission is to help home cooks enjoy tasty meals without stress.