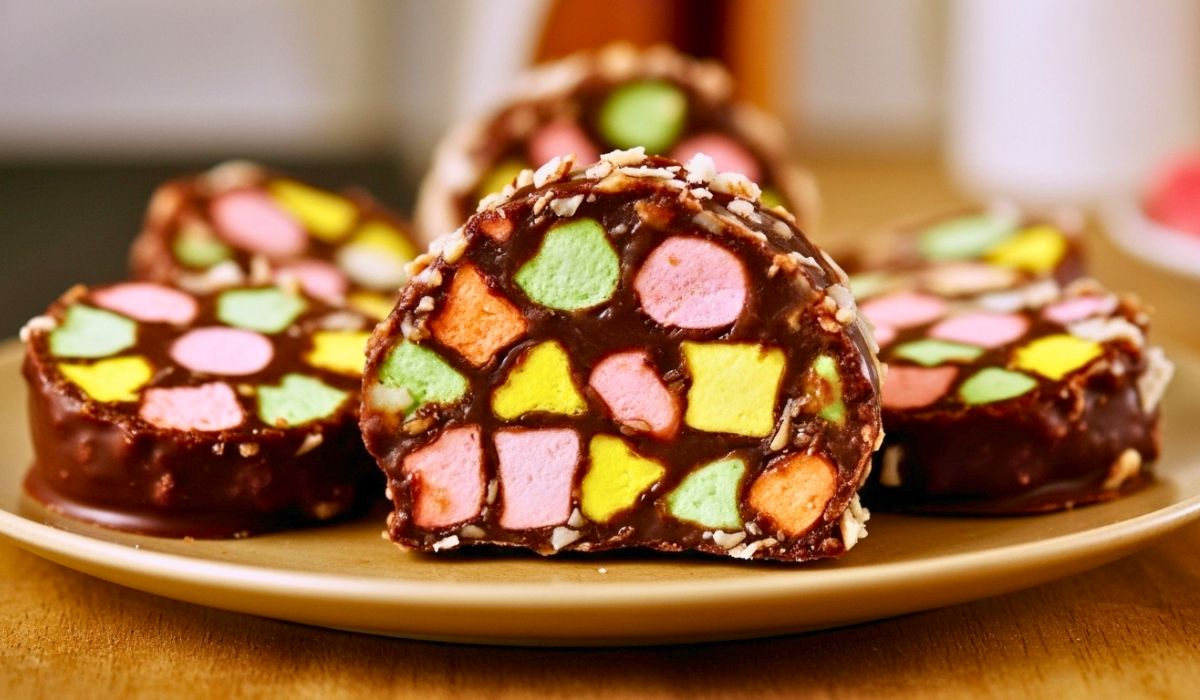
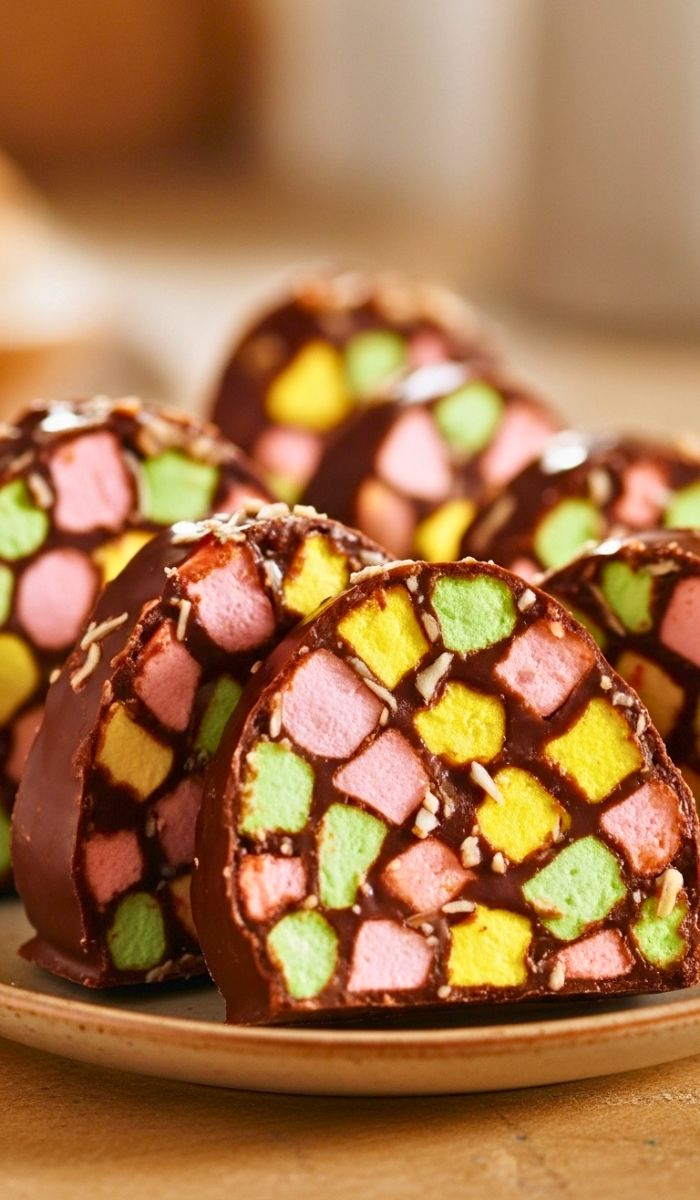
If you enjoy bright, fun and sweet treats, you will love this Colorful Cathedral Candy Recipe. This candy looks like colorful stained-glass windows.
It has a soft, chewy texture and a rich, creamy taste. Kids and adults both enjoy this candy. It is perfect for parties, holidays or sweet gifts.
The candy uses simple ingredients and very easy steps. You can mix many colors to create a beautiful look.
This Colorful Cathedral Candy Recipe tastes amazing and looks magical. You can also shape it in many ways. You will enjoy making it, sharing it and eating it. Learning how to make Colorful Cathedral Candy is simple and joyful.
My Experience With This Recipe
I first tried this candy during a holiday party. The bright colors caught my eye. The soft texture surprised me in a good way.
It tasted creamy, sweet and smooth. I wanted to make it at home right away. When I made it myself, I loved how easy it was.
The colors looked beautiful and the candy set very well. My family enjoyed every piece. Now, this candy is a regular treat in my home. It makes every table look cheerful and fun.
Recipe Card Info
- Recipe Name: Colorful Cathedral Candy Recipe
- Servings: 10
- Prep Time: 20 mins
- Cook Time: 5 mins
- Total Time: 25 mins
- Course: Dessert / Candy
- Cuisine: American
- Calories: 180 kcal per serving
Equipment List
- Large mixing bowl
- Small saucepan
- Spoon or spatula
- Sharp knife
- Cutting board
- Plastic wrap
- Loaf pan or tray
- Measuring cups and spoons
Ingredients You Need for Colorful Cathedral Candy Recipe
- 4 cups colorful mini marshmallows
- 1 cup chopped nuts (optional)
- 1/2 cup unsalted butter
- 1 cup chocolate chips
- 1/2 cup peanut butter
- 1 tsp vanilla extract
Instructions
1. Prepare the Pan
Line a loaf pan with plastic wrap. Make sure it covers the sides well.
2. Melt the Butter
Add butter to a saucepan. Heat on low until fully melted.
3. Add Chocolate Chips
Add chocolate chips to the melted butter. Stir until smooth and creamy.
4. Mix in Peanut Butter
Add peanut butter to the pan. Stir until everything melts together.
5. Add Vanilla Extract
Remove the pan from heat. Add vanilla and mix well.
6. Cool the Mixture
Let the chocolate mixture cool slightly. You do not want melted marshmallows.
7. Add Marshmallows
Pour colorful marshmallows into a large bowl. Make sure they are dry.
8. Add Nuts if Using
Add chopped nuts to the marshmallows for extra crunch.
9. Pour Chocolate Mixture
Pour warm chocolate mixture over marshmallows. Mix gently with a spatula.
10. Spread in Pan
Place mixture into the loaf pan. Press gently to remove empty spaces.
11. Wrap and Chill
Cover the top with plastic wrap. Chill in the fridge for 2–3 hours.
12. Cut the Candy
Remove candy from pan. Use a sharp knife to slice into colorful pieces.
13. Serve and Enjoy
Serve the candy fresh. Enjoy the bright colors and sweet taste.
Recipe Tips
- Cool the chocolate mixture before adding marshmallows.
- Use fresh mini marshmallows for best texture.
- Add nuts only if you enjoy extra crunch.
- Use bright marshmallow colors for a pretty look.
- Chill the candy fully before slicing.
- Keep your knife slightly warm for smooth cuts.
Nutrition Information
| Nutrient | Amount |
|---|---|
| Calories | 180 kcal |
| Protein | 3 g |
| Carbs | 24 g |
| Fat | 9 g |
| Sugar | 18 g |
| Fiber | 1 g |
Serving Suggestions
This candy works well for many events and meals:
- Serve at kids’ parties for bright colors and fun shapes.
- Add pieces to dessert platters during holidays.
- Enjoy with hot cocoa for a warm, sweet treat.
- Pack in lunchboxes for a colorful surprise.
- Use as a topping for ice cream or sundaes.
Best Sides To Serve With
1. Fresh Fruit Bowl
Fresh fruit adds lightness. It balances the rich candy well.
2. Vanilla Ice Cream
Soft ice cream pairs perfectly with chewy candy pieces.
3. Hot Chocolate
Warm drinks enhance the candy’s sweet and creamy flavor.
Storage and Reheating Tips
- Store leftovers in an airtight container.
- Keep candy in the fridge for best texture.
- It stays fresh for up to one week.
- Do not freeze, as marshmallows lose texture.
- No reheating is needed; serve cold or room temperature.
FAQs About Colorful Cathedral Candy Recipe
Q1: Why is my candy too sticky?
Your chocolate mixture may have been too warm. Warm chocolate melts the marshmallows and makes the candy sticky. Let the mixture cool longer next time for better texture.
Q2: Can I use white chocolate instead?
Yes, you can use white chocolate for a different look. It gives the candy a creamy color and sweet taste. Make sure to melt it slowly to avoid burning.
Q3: Can I make this candy nut-free?
Yes, simply skip the nuts. The recipe still tastes amazing. You can add extra marshmallows or small cereal pieces instead for crunch.
Q4: How do I keep the candy shape firm?
Make sure it chills long enough in the fridge. If the candy is soft, chill for an extra hour. Press the mixture firmly into the pan before chilling.
Q5: Can kids help make this recipe?
Yes, this is a great recipe for kids. They can mix marshmallows, choose colors, and help shape the candy. Just keep them away from the hot pan.
Conclusion
This Colorful Cathedral Candy Recipe is fun, bright and delightful. It brings joy to your kitchen with simple steps and beautiful colors.
You now know how to make Colorful Cathedral Candy at home using easy ingredients. The candy is creamy, chewy, and perfect for sharing.
It looks like stained glass and tastes sweet and rich. Make it for parties, holidays or any happy moment.
Enjoy this lovely treat with your family and friends. Let the colors and flavors bring smiles to everyone who takes a bite.

Colorful Cathedral Candy Recipe
Ingredients
- 4 cups colorful mini marshmallows
- 1 cup chopped nuts optional
- 1/2 cup unsalted butter
- 1 cup chocolate chips
- 1/2 cup peanut butter
- 1 tsp vanilla extract
Instructions
Prepare the Pan
- Line a loaf pan with plastic wrap. Make sure it covers the sides well.
Melt the Butter
- Add butter to a saucepan. Heat on low until fully melted.
Add Chocolate Chips
- Add chocolate chips to the melted butter. Stir until smooth and creamy.
Mix in Peanut Butter
- Add peanut butter to the pan. Stir until everything melts together.
Add Vanilla Extract
- Remove the pan from heat. Add vanilla and mix well.
Cool the Mixture
- Let the chocolate mixture cool slightly. You do not want melted marshmallows.
Add Marshmallows
- Pour colorful marshmallows into a large bowl. Make sure they are dry.
Add Nuts if Using
- Add chopped nuts to the marshmallows for extra crunch.
Pour Chocolate Mixture
- Pour warm chocolate mixture over marshmallows. Mix gently with a spatula.
Spread in Pan
- Place mixture into the loaf pan. Press gently to remove empty spaces.
Wrap and Chill
- Cover the top with plastic wrap. Chill in the fridge for 2–3 hours.
Cut the Candy
- Remove candy from pan. Use a sharp knife to slice into colorful pieces.
Serve and Enjoy
- Serve the candy fresh. Enjoy the bright colors and sweet taste.
Notes
- Cool the chocolate mixture before adding marshmallows.
- Use fresh mini marshmallows for best texture.
- Add nuts only if you enjoy extra crunch.
- Use bright marshmallow colors for a pretty look.
- Chill the candy fully before slicing.
- Keep your knife slightly warm for smooth cuts.
Sara Collins is a food blogger at TastyDive. She shares simple and family-friendly recipes made with everyday ingredients. Her mission is to help home cooks enjoy tasty meals without stress.