
This Homemade Chocolate Lip Balm Recipe is simple, fun and keeps your lips soft and smooth. Making your own lip balm at home is easy. You control the ingredients and can make it natural and safe.
The chocolate flavor makes it tasty and delightful. It is perfect for winter or dry weather. You can also gift it to friends and family.
This recipe uses simple ingredients for Homemade Chocolate Lip Balm that are easy to find. Follow this guide to learn how to make Homemade Chocolate Lip Balm step by step. You will enjoy soft, moisturized lips with a chocolatey touch.
My Experience With This Homemade Chocolate Lip Balm
I first tried making this Homemade Chocolate Lip Balm Recipe on a weekend. The process was fun and creative. I loved melting the ingredients and adding chocolate flavor. The final balm was smooth and smelled amazing.
Applying it felt soft and moisturizing. I also made a few extra to gift my friends. Everyone enjoyed it. It is easy, fast and satisfying. Now, I make this lip balm often for myself and family. It is a perfect DIY beauty project.
Recipe Card Info
- Recipe Name: Homemade Chocolate Lip Balm
- Servings: 3–4 small containers
- Prep Time: 5 mins
- Cook Time: 5 mins
- Total Time: 10 mins
- Course: DIY Beauty
- Cuisine: Homemade
- Calories: 10 kcal per serving (non-edible)
Equipment List
- Small heatproof bowl or glass jar
- Small saucepan (for double boiler)
- Spoon or spatula
- Measuring spoons
- Small lip balm containers or tins
Ingredients You Need for Homemade Chocolate Lip Balm
- 2 tbsp beeswax pellets
- 2 tbsp coconut oil
- 1 tbsp shea butter or cocoa butter
- 1 tsp cocoa powder (unsweetened)
- 5–10 drops of vanilla or chocolate essential oil (optional)
- Small lip balm containers or tins
Instructions
1. Prepare Double Boiler
Fill a small saucepan with water. Place a heatproof bowl on top. Make sure water does not touch the bowl.
2. Melt Beeswax
Add beeswax pellets to the bowl. Stir occasionally until fully melted and smooth.
3. Add Coconut and Shea Butter
Add coconut oil and shea butter. Stir gently until everything melts together evenly.
4. Add Cocoa Powder
Sprinkle cocoa powder into the melted mixture. Stir well to get smooth chocolate color and flavor.
5. Add Essential Oil
Add vanilla or chocolate essential oil if desired. Mix thoroughly for a nice scent and extra flavor.
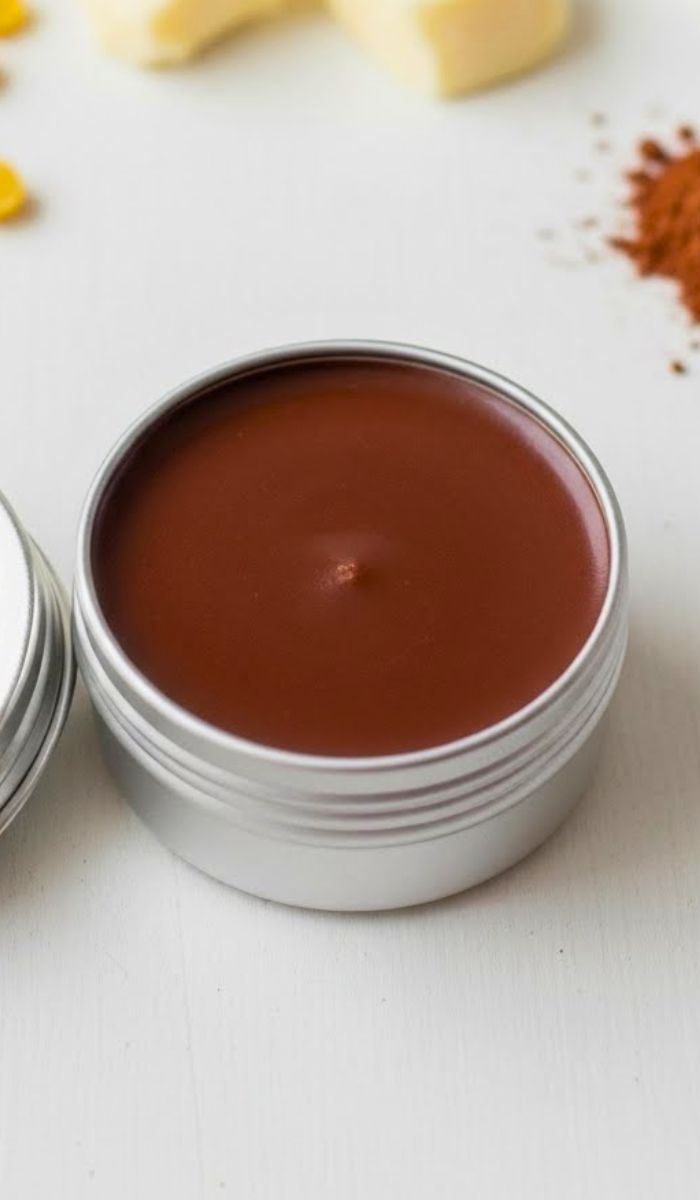
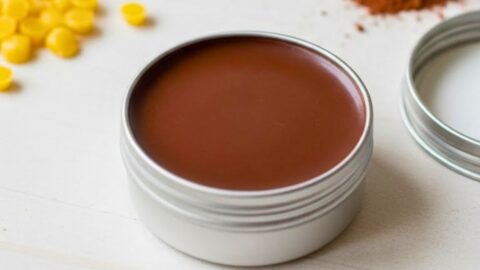
6. Pour Into Containers
Carefully pour melted mixture into small lip balm containers or tins. Fill evenly and quickly.
7. Let Balm Set
Leave containers at room temperature for 30–60 minutes. Balm will harden and be ready to use.
Recipe Tips
- Use high-quality cocoa powder for better flavor and color.
- Do not overheat; melt slowly to avoid burning ingredients.
- Use silicone molds if you don’t have containers.
- Add a few drops of vitamin E oil for extra lip care.
- Store in a cool, dry place to prevent melting.
Nutrition Information
| Nutrient | Amount |
|---|---|
| Calories | 10 kcal |
| Fat | 1 g |
| Carbs | 0.5 g |
| Protein | 0 g |
| Sugar | 0 g |
Serving Suggestions
Apply Homemade Chocolate Lip Balm whenever lips feel dry or chapped. It is perfect for winter or hot days. Use as a quick beauty fix before going out.
Also, carry in your bag for a moisturizing touch anytime. It can be a cute gift for friends, paired with small cosmetic bags or candles.
Best Sides To Serve With
Pair lip balm gifts with homemade soaps, candles or body scrubs. It also works well with small DIY beauty kits. Use with moisturizing hand cream for a complete self-care set.
Storage and Reheating Tips
Store lip balm in a cool, dry place. Avoid leaving in hot areas, as it may melt. If melted, gently reheat using a double boiler and pour back into containers. The balm lasts for 6–12 months if stored properly.
Homemade Chocolate Lip Balm Recipe
Ingredients
- 2 tbsp beeswax pellets
- 2 tbsp coconut oil
- 1 tbsp shea butter or cocoa butter
- 1 tsp cocoa powder unsweetened
- 5 –10 drops of vanilla or chocolate essential oil optional
- Small lip balm containers or tins
Instructions
Prepare Double Boiler
- Fill a small saucepan with water. Place a heatproof bowl on top. Make sure water does not touch the bowl.
Melt Beeswax
- Add beeswax pellets to the bowl. Stir occasionally until fully melted and smooth.
Add Coconut and Shea Butter
- Add coconut oil and shea butter. Stir gently until everything melts together evenly.
Add Cocoa Powder
- Sprinkle cocoa powder into the melted mixture. Stir well to get smooth chocolate color and flavor.
Add Essential Oil
- Add vanilla or chocolate essential oil if desired. Mix thoroughly for a nice scent and extra flavor.
Pour Into Containers
- Carefully pour melted mixture into small lip balm containers or tins. Fill evenly and quickly.
Let Balm Set
- Leave containers at room temperature for 30–60 minutes. Balm will harden and be ready to use.
Notes
- Use high-quality cocoa powder for better flavor and color.
- Do not overheat; melt slowly to avoid burning ingredients.
- Use silicone molds if you don’t have containers.
- Add a few drops of vitamin E oil for extra lip care.
- Store in a cool, dry place to prevent melting.
FAQs about Homemade Chocolate Lip Balm
1. Can I make lip balm vegan?
Yes, replace beeswax with candelilla wax. All other ingredients remain natural and safe for vegan use.
2. Can I use other flavors?
Yes, try peppermint, orange, or vanilla essential oils. Mix and match for fun lip balm variations.
3. How long does this lip balm last?
Stored properly, it lasts up to 12 months. Keep away from heat and direct sunlight.
4. Can I use cocoa butter instead of shea butter?
Yes, cocoa butter works well. It gives extra chocolate scent and smooth texture for lips.
5. Can I use this lip balm on sensitive lips?
Yes, this homemade recipe uses natural ingredients, but test a small area first to avoid allergies.
Conclusion
This Homemade Chocolate Lip Balm Recipe is simple, natural and fun to make. You only need basic ingredients for Homemade Chocolate Lip Balm. Now you know how to make Homemade Chocolate Lip Balm in just a few minutes.
It is perfect for personal use or gifts. Enjoy smooth, soft and chocolate-scented lips every day. Try different flavors and colors to make it unique and creative.
Sara Collins is a food blogger at TastyDive. She shares simple and family-friendly recipes made with everyday ingredients. Her mission is to help home cooks enjoy tasty meals without stress.