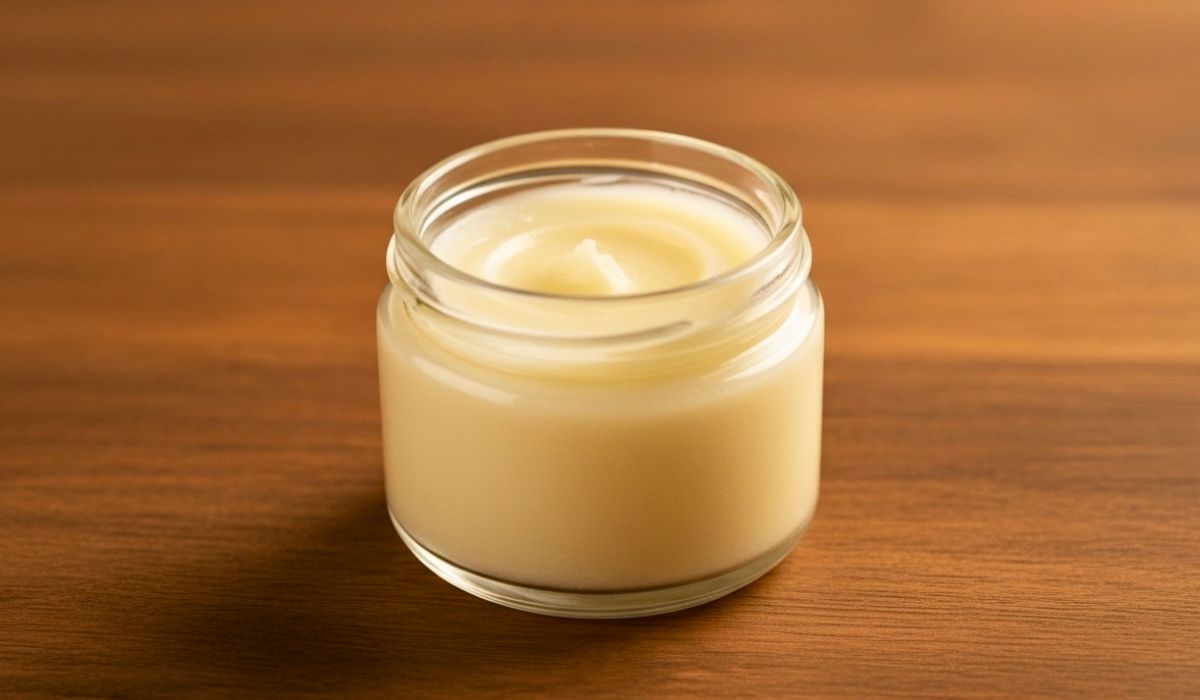
Do you want soft, smooth skin without buying expensive products? Try this DIY Homemade Vaseline Recipe. It is easy, safe and natural. Making your own Vaseline at home is simple.
You only need a few common ingredients. This recipe is perfect for dry skin, lips, and even minor cuts. Plus, it’s chemical-free and budget-friendly.
In this blog, I will share my experience, the full recipe and helpful tips. By the end, you will know exactly how to make DIY Homemade Vaseline at home. Let’s get started with this easy and fun recipe!
My Experience With This Recipe
I first tried making homemade Vaseline because I wanted a natural alternative. Commercial products often have chemicals I don’t like. This recipe was very easy to follow. I love how soft my lips and hands feel now. The Vaseline melts quickly, mixes easily, and sets perfectly.
I also enjoy adding natural oils for a subtle scent. Making it at home is cheaper and safer than store-bought versions. Plus, it feels satisfying to use something you made yourself. My friends and family loved it too!
Recipe Card info
- Recipe Name: DIY Homemade Vaseline
- Servings: 1 small jar
- Prep Time: 5 mins
- Cook Time: 10 mins
- Total Time: 15 mins
- Course: Skincare
- Cuisine: DIY / Homemade
- Calories: 0 kcal per serving
Equipment List
- Small saucepan
- Heatproof bowl
- Spoon or spatula
- Small jar with lid
- Measuring spoons
- Optional: double boiler
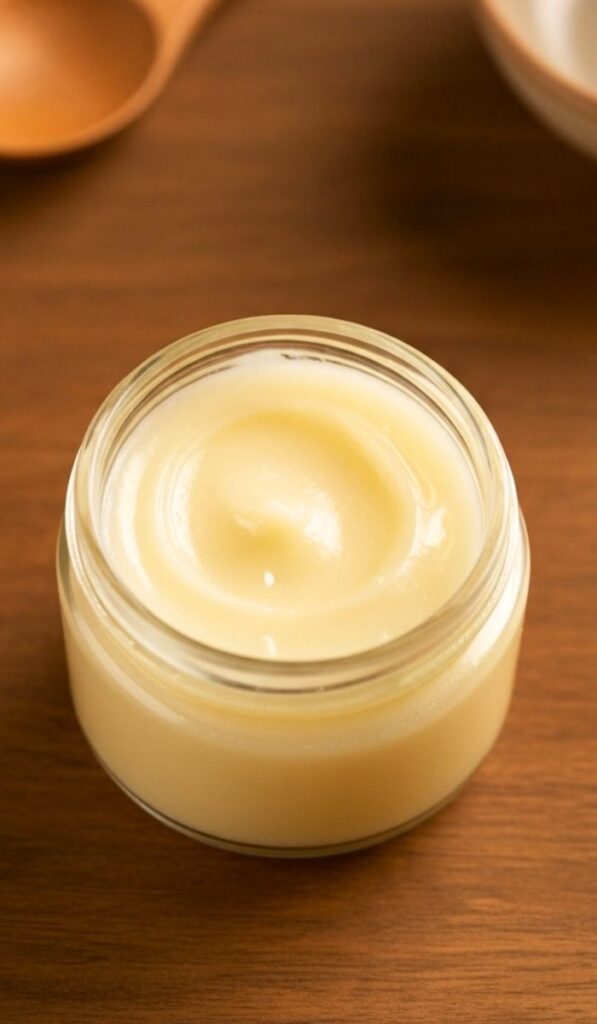
Ingredients You Need for DIY Homemade Vaseline
- 1/4 cup coconut oil
- 1/4 cup beeswax pellets
- 2 tablespoons olive oil or almond oil
- Optional: few drops of essential oil (lavender, peppermint)
Instructions
- Melt the beeswax
Put beeswax in a heatproof bowl. Heat gently over low flame until fully melted. - Add coconut oil
Pour coconut oil into melted beeswax. Stir slowly until mixture is smooth. - Mix in olive oil
Add olive or almond oil. Stir continuously for even blending. - Optional: add essential oils
Add 3–5 drops of essential oil for fragrance. Stir well into the mixture. - Pour into jar
Carefully pour mixture into a small jar. Use a spoon if needed. - Let it cool
Leave the jar at room temperature for 1–2 hours. Wait until fully solid. - Seal and store
Close the jar tightly. Keep in a cool, dry place for best results.
Recipe Tips
- Use a double boiler if you don’t want direct heat on beeswax.
- Adjust oils for softer or firmer Vaseline.
- Coconut oil works well for smooth texture.
- Always store in a cool place to prevent melting.
- Clean utensils immediately; mixture hardens fast.
Nutrition Information
| Ingredient | Amount per Serving | Calories |
|---|---|---|
| Coconut Oil | 1/4 cup | 480 kcal |
| Beeswax | 1/4 cup | 910 kcal |
| Olive/Almond Oil | 2 tbsp | 240 kcal |
| Essential Oil | Few drops | 0 kcal |
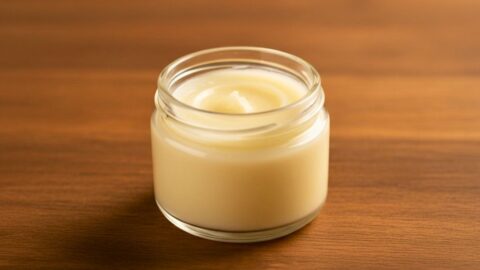
Serving Suggestions
Use DIY Homemade Vaseline on lips, hands, elbows or knees. It works well as a cuticle softener. You can apply before bed for overnight hydration.
Dab a small amount on dry patches for quick relief. Some people like using it as a base for homemade makeup. It also makes a gentle lip balm with natural shine.
Best Sides To Serve With
While it’s skincare, not food, pair your Vaseline use with a relaxing routine. For example, read a book or apply after a warm shower.
Moisturizing while your skin is slightly damp improves results. You can also combine it with DIY scrubs for smooth, glowing skin.
Storage and Reheating Tips
Store in a cool, dark place. Avoid sunlight to keep it firm. If it melts in hot weather, simply stir and let it solidify again. Use a clean spoon to scoop; avoid fingers to prevent contamination. Your homemade Vaseline can last up to 6 months if stored properly.
DIY Homemade Vaseline Recipe
Ingredients
- 1/4 cup coconut oil
- 1/4 cup beeswax pellets
- 2 tablespoons olive oil or almond oil
- Optional: few drops of essential oil lavender, peppermint
Instructions
Melt the beeswax
- Put beeswax in a heatproof bowl. Heat gently over low flame until fully melted.
Add coconut oil
- Pour coconut oil into melted beeswax. Stir slowly until mixture is smooth.
Mix in olive oil
- Add olive or almond oil. Stir continuously for even blending.
Optional: add essential oils
- Add 3–5 drops of essential oil for fragrance. Stir well into the mixture.
Pour into jar
- Carefully pour mixture into a small jar. Use a spoon if needed.
Let it cool
- Leave the jar at room temperature for 1–2 hours. Wait until fully solid.
Seal and store
- Close the jar tightly. Keep in a cool, dry place for best results.
Notes
- Use a double boiler if you don’t want direct heat on beeswax.
- Adjust oils for softer or firmer Vaseline.
- Coconut oil works well for smooth texture.
- Always store in a cool place to prevent melting.
- Clean utensils immediately; mixture hardens fast.
FAQs about DIY Homemade Vaseline
Q1: Can I use this Vaseline for babies?
Yes, it is safe for babies in small amounts. Use plain ingredients only, no essential oils.
Q2: How firm will my homemade Vaseline be?
The firmness depends on beeswax and oil ratio. Add more beeswax for harder texture.
Q3: Can I add scents or flavors?
Yes, add a few drops of essential oils for fragrance. Avoid artificial scents.
Q4: Can I use it on my hair?
Yes, a tiny amount can tame frizz or split ends. Avoid overuse, it can feel greasy.
Q5: How long does it last?
Homemade Vaseline lasts 4–6 months in a cool, dry place. Always check for odor changes.
Conclusion
DIY Homemade Vaseline Recipe is easy, safe and natural. You can make it with a few simple ingredients. It keeps skin soft, smooth and hydrated. Making it at home is fun and budget-friendly.
You can customize with oils and scents for your personal touch. Follow the step-by-step instructions, and you’ll have your own jar ready. Enjoy natural skincare with this simple, effective recipe. Try it today and feel the difference!
Sara Collins is a food blogger at TastyDive. She shares simple and family-friendly recipes made with everyday ingredients. Her mission is to help home cooks enjoy tasty meals without stress.